So now that I have all of these, how do I use them?
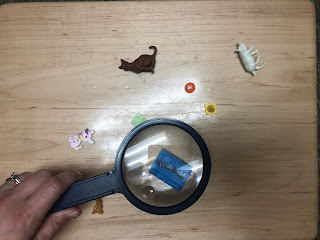
1.) Pair with a magnifying glass. My objects are not small enough that you actually need one, but it's super fun for the kids!
2.) Pair with a telescope or binoculars. I hid some of the objects around the room and the kids find them. This is a great activity if you've got a student who needs a little more movement. I have these fun pirate telescopes that I picked up at a consignment sale.
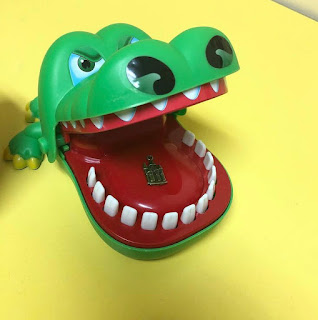
3.) Give Crocodile Dentist (affiliate link) a snack. We saw "Don't Eat My....." before pushing down a tooth. Also, did you know there is now a Dinosaur Dentist? So fun!
4.) Hide them in these Learning Resources Treasure Chests (affiliate link). Students can use the keys to find the treasure! As you can see, this set actually comes with 5 mini objects and coins that you might be able to add to your collection.
5.) If the items are big enough, you can hide them in these stacking ball sets. (affiliate link) Students can peek through the hole to guess what is inside. Then open it up and name what is inside.
6.) Have them draw pictures of their mini objects. Your little artists can then take their drawings home for additional practice.
7.) Hide them in these Rock 'N Gem Surprise rocks (affiliate). Students can use the tools to open them up and see what's inside.
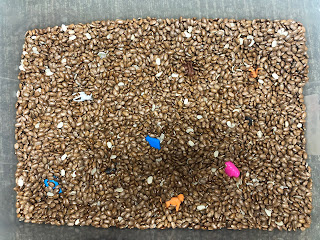
8.) Add them to your sensory bins.
9.) Hide them in these Learning Resources Mini Barns (affiliate link). This is a great activity to use during a farm theme.
10.) Add them to a water table or bin. Do they sink or float? Rescue them and put them in your boat.
11.) Hide them in Easter eggs. Students can open them up for a fun surprise! When it's not Easter time, or if you are not allowed/don't want to celebrate religious holidays, pretend they are dinosaur eggs. I like to choose eggs that match the colors of my dinosaur toys. Then we can figure out which egg belongs to which dinosaur by matching the colors.
12.) Put some in a sensory bottle or bag to play I Spy.
13.) Pair with dump trucks, tractors with loaders or wagons, bull dozers, etc. Load them up, naming each one as you put it in. Haul it around and dump it out.
14.) Rescue them from a muffin tin. Peel the tape off to get the objects out. Or try to reach in through the tape to grab them.
15.) Guess the cup. Students can take turns hiding them under one of 3 solo cups. Do the usual switching around of the cups and everyone else can guess what cup it's under. Just make sure every one is saying the object label when they guess!
16.) Swap the eggs for mini objects in this Dinosaur Crunch Game. (affiliate link) Who can steal the most items before the dinosaur attacks?!
17.) Rescue them from a yarn basket - you can use tongs to make the task harder, if needed.
18.) Hide them in Ned's Head. See if your students can guess what it is before they pull it out. Make sentences like, "Ned had a _______ in his ear/nose" to increase the difficulty level.
19.) Oh no! They're on fire! Can you save them with a squirt bottle? I just printed out a fire picture, laminated it, and placed the mini objects on it. Have your students say the item's label as they are squirting the pictures to work on those articulation sounds in a divided attention situation. The fire clip art is from The Firefighter Kids Clip Art Set from Creative Clips.
20.) Tape grab. Wrap masking or painters tape around your student's palm with the sticky side out. Can they pick up the mini items with the tape? Or is the item too heavy? Can they peel the item off the tape with their other, free hand?
21.) Pair with Melissa and Doug Sandwich Making Kit (affiliate link) and Sam's Sandwich by David Pelham (affiliate link). We read the book, then make our own silly sandwich by hiding the mini objects between the sandwich layers. I have the wooden set, but the felt set (affiliate link) would probably work better if some of your objects are a little bigger.
22.) While we're on the food them - you could also decorate a cake with them, top a pizza with them - whatever play food you have on hand. To avoid buying and storing more toys, I actually just printed out a pizza graphic, laminated it, and have the students add their own silly "toppings." The pizza graphic is from My Cute Graphics. Here is a cute cake graphic if you choose to do that. Graphics from My Cute Graphics are free to use.
23.) Hide them in these Learning Resources Presents (affiliate link) for a fun Christmas themed or birthday activity.
24.) I picked up these fun seashell eggs at Dollar Tree around Easter time last year. You can hid the mini objects in these and add them to your sand bin/table for a cute beach theme.
25.) Hide them in "grass" (a Boon bottle drying rack). This activity pairs great with the book "In the Tall, Tall Grass."
I hope some of these ideas were something new or fun for your therapy room. If you are looking to make articulation skills harder for your patients, you can find my Mini Object Articulation Sentence Strips here.
If you are looking for ways to use mini objects for language skills, you can check out my Language Prompts for Mini Objects.
Thanks for stopping by!


No comments:
Post a Comment